The last couple of weeks has been a whirlwind of activity for my home. My house just recently went up on the market and the feedback I got on my home was a total shocker. Like, I have never been so LITERAL about my jaw dropping on response from the MLS listing. To make a long story short, my house was on the market for a total of 4 days before we went under contract, I had 69 scheduled showings (some of which were canceled due to the contract) and 12 offers (most of which were WELL above asking price). Needless to say, I severely underestimated my decorative skills because every feedback note we got on the house was that it was a beautiful property, showed extremely well and of course smelled great (as a chandler I’d be disappointed if it didn’t).
*This post contains affiliate links.
Those of you who have been following my home reno journey over the last couple of years know I struggled with the kitchen. I went back and forth on whether or not to paint the cabinets or save money for a full gut job. The military orders to southern Virginia kind of put me into decision making mode and I decided the best bang for my buck was to paint the cabinets. Over the last three years, I made minor updates to the kitchen, but the biggest transformation of all was the cabinets.
Before we get into the all the pretty updated pictures, lets take a look at where we started:
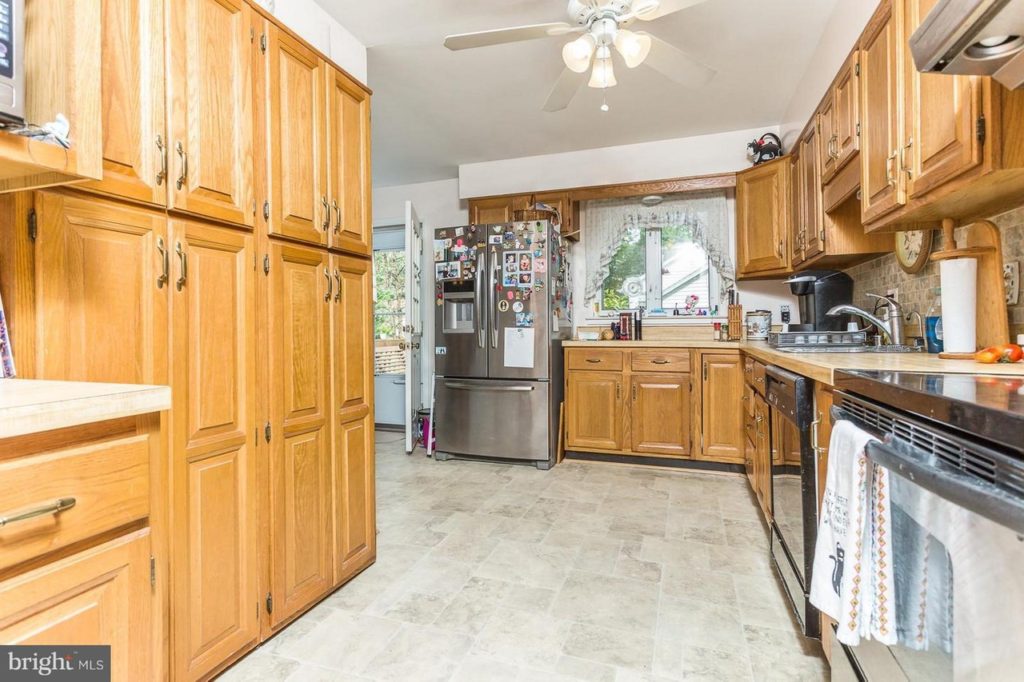
The kitchen was nothing short of…old and brown. Honestly, I didn’t know where to start with this kitchen. It had everything that screamed “DEMO ME!” We’re talking formica countertops, vinyl flooring, faux stone backsplash, grimy appliances, “Stainless” steel sink and mother goose curtains(yikes). I just knew this was going to be a major money pit so I figured the easiest thing to do would be to change the things I ABSOLUTELY could not live with first then save and update as I could afford. Although the orange cabinetry was killing me, I could live with it until I settled on design.
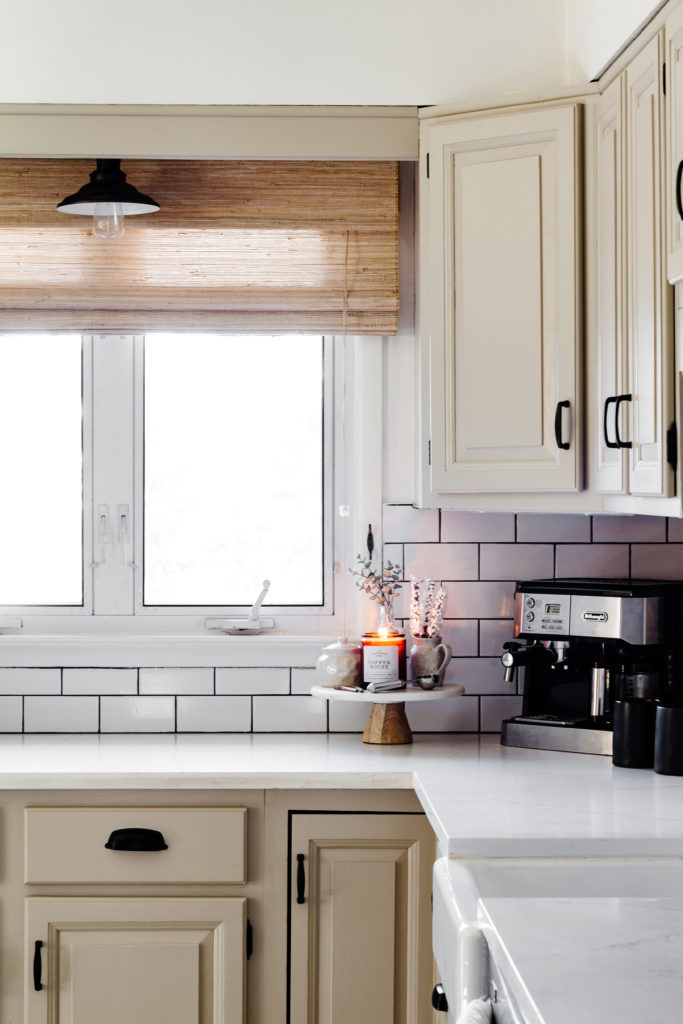
And now…here’s a look after all the updates almost four years later.
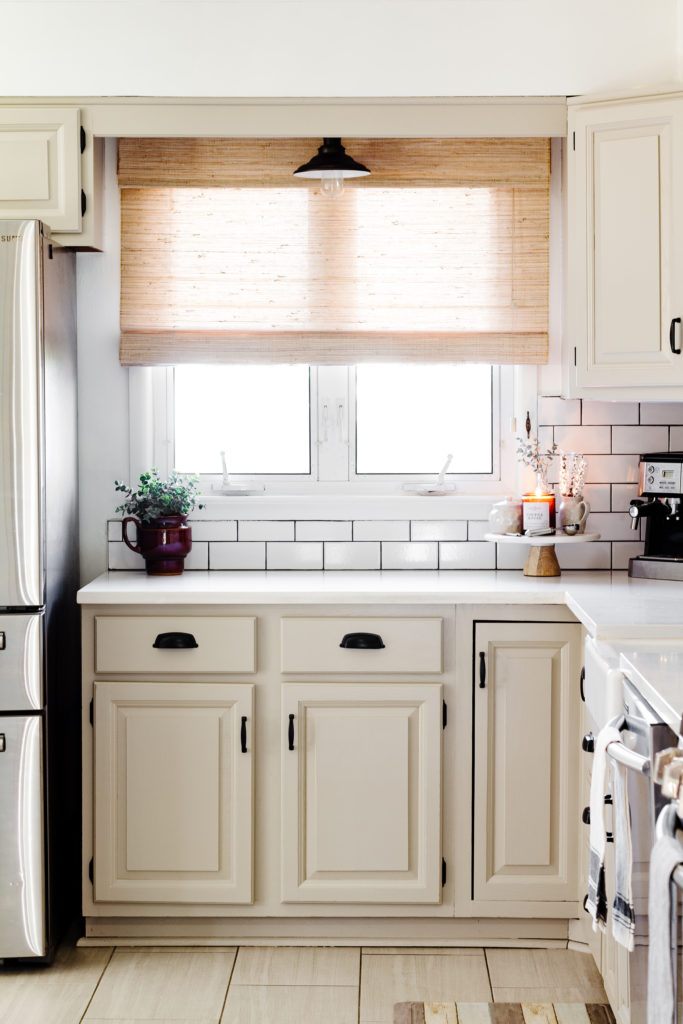
I mean….COME ON! Can we talk about this transformation?! It looks like a completely different kitchen and I love that I didn’t break the bank on these updates. At the end of this blog post I will break down what I spent on the kitchen and provide a list of sources. Overall, I’d say that making over this kitchen played a HUGE part in the response to my house on the market. I can honestly say, if I had left the kitchen the way it was, I wouldn’t have gotten the offers I did on my home. A buyer would have instantly thought to offer less due to the cost of a kitchen reno.
First off, we replaced the linoleum vinyl sheet flooring and replaced it with a neutral gray and cream ceramic tile. You can’t see in this blog post that we removed a wall that separated the dining area from the “breakfast nook,” but that is for a later blog. We did do this because the breakfast nook was tiny and could barely fit an average size table. By removing the wall, we opened the dining space and made the upper living area feel larger.
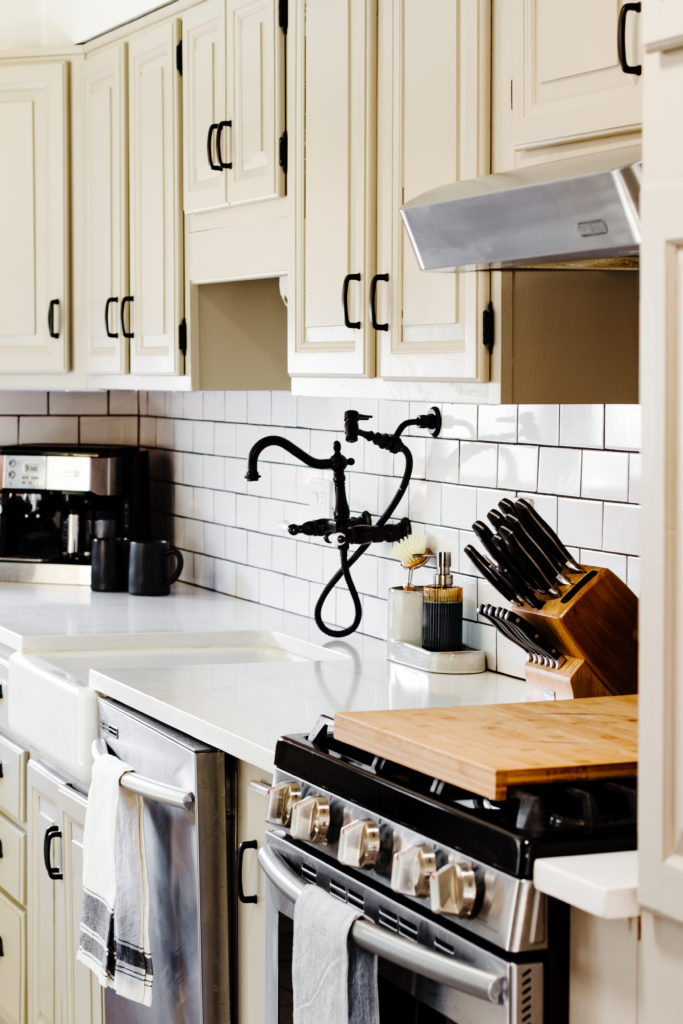
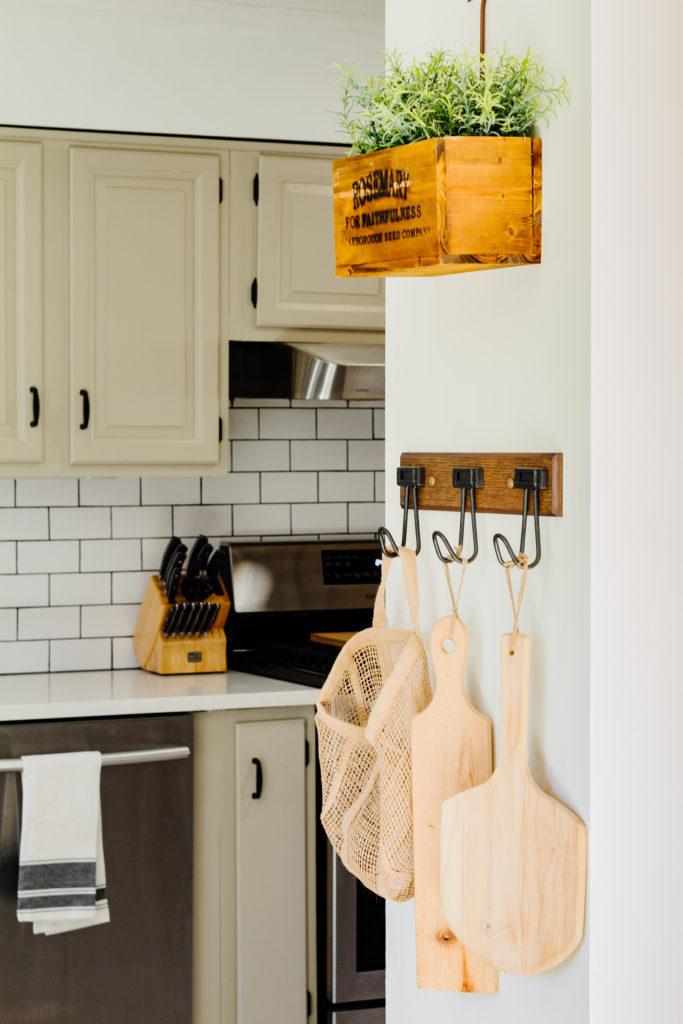
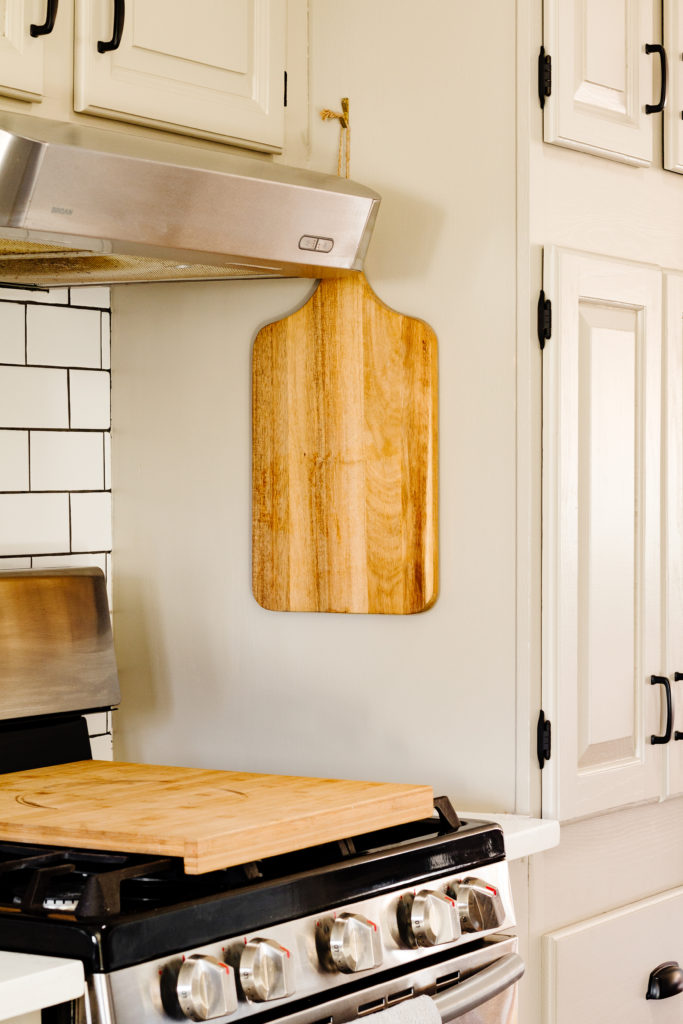
One thing I needed to do asap was hire a plumber to install a gas line. I absolutely loathe cooking on electric stoves, so that had to go! We also got a new low profile hood vent that fit perfectly underneath the cabinets.
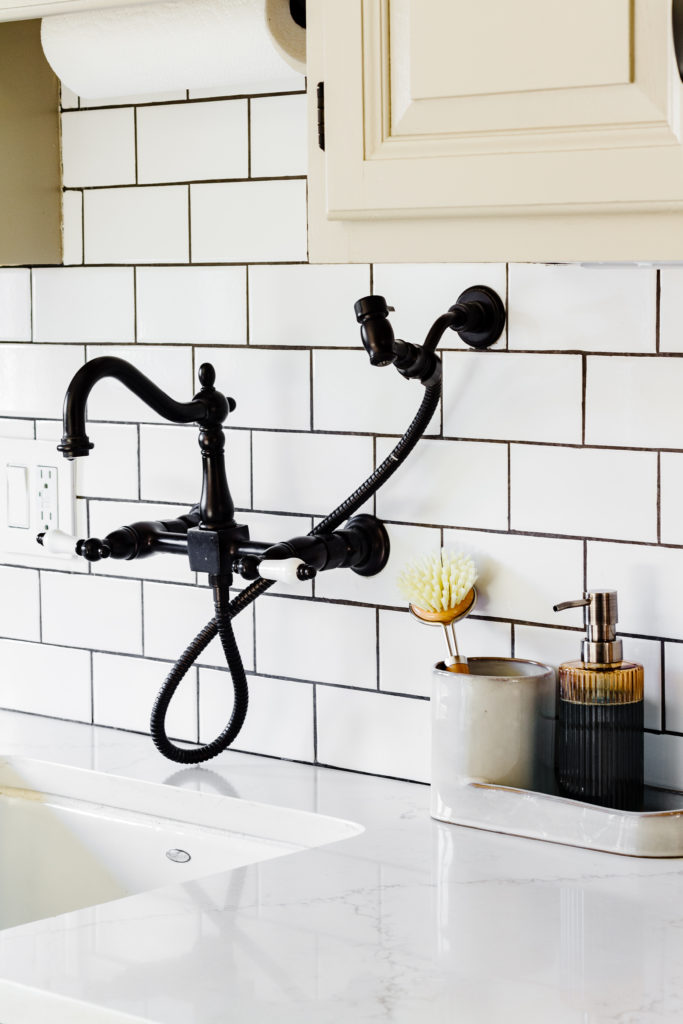
The next thing I focused on getting done was new counter tops and a new backsplash. While the formica was durable as heck, quartz counter tops were really at the top of my list due to their popularity for durability and cosmetic appeal. The counters looked so good even with the oak cabinetry and complimented by the classic subway tile with black grout, the kitchen looked so different already. We hired a local contractor to do both the counters and tile in one fell swoop. We also installed under mount lighting which you can’t see during the daytime, but at night makes the kitchen sparkle.
I also loved the idea of a wall mounted faucet. We were short on countertop and prep space so any little bit helped. The old victorian look of this faucet with sprayer was perfect for my “modern farmhouse” style kitchen.

Of course you CAN’T have a farmhouse kitchen without a farmhouse sink. Since we were replacing a small sink area and didn’t have much room to work with as far as the actual bowl, I went with a shallow, self-trimming short apron front sink. This means the bowl has a decorative edge that hides the cuts into the cabinetry. This is perfect for those who are installing farmhouse sinks into pre-existing cabinetry rather than custom cabinets getting build around the sink.
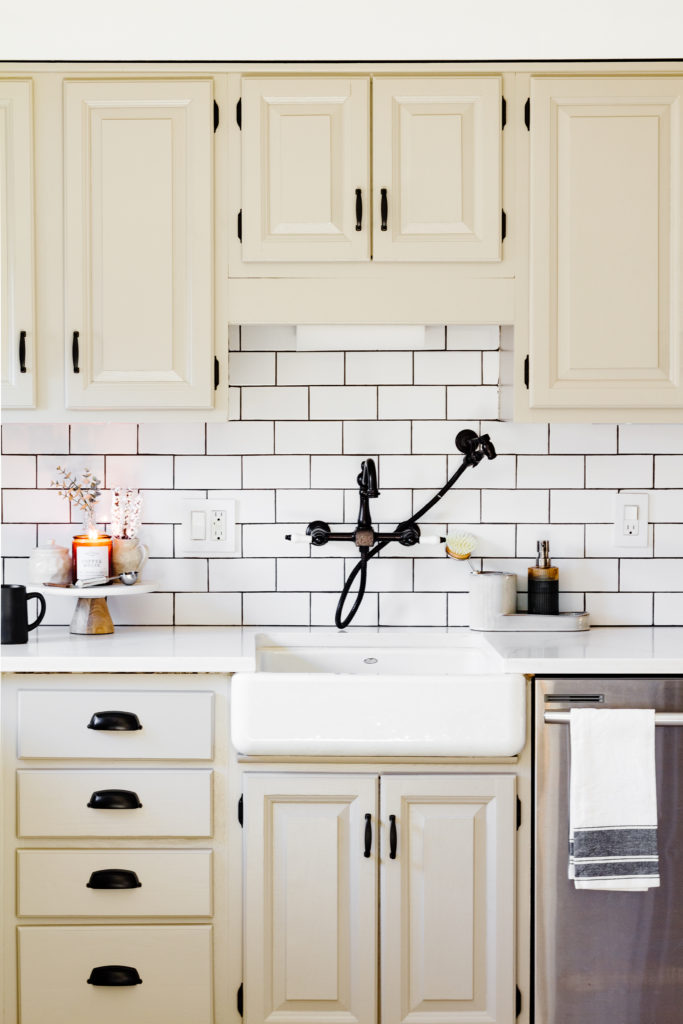
The real star of the show is the cabinets. For a whole lot of elbow grease and a little TLC these cabinets got a real facelift. I’ll explain the process of repainting cabinets in another post, but the dramatic transformation was brought to you by one gallon of Zinsser BIN Primer and one gallon of Benjamin Moore Advance paint in the color “Pashmina.”
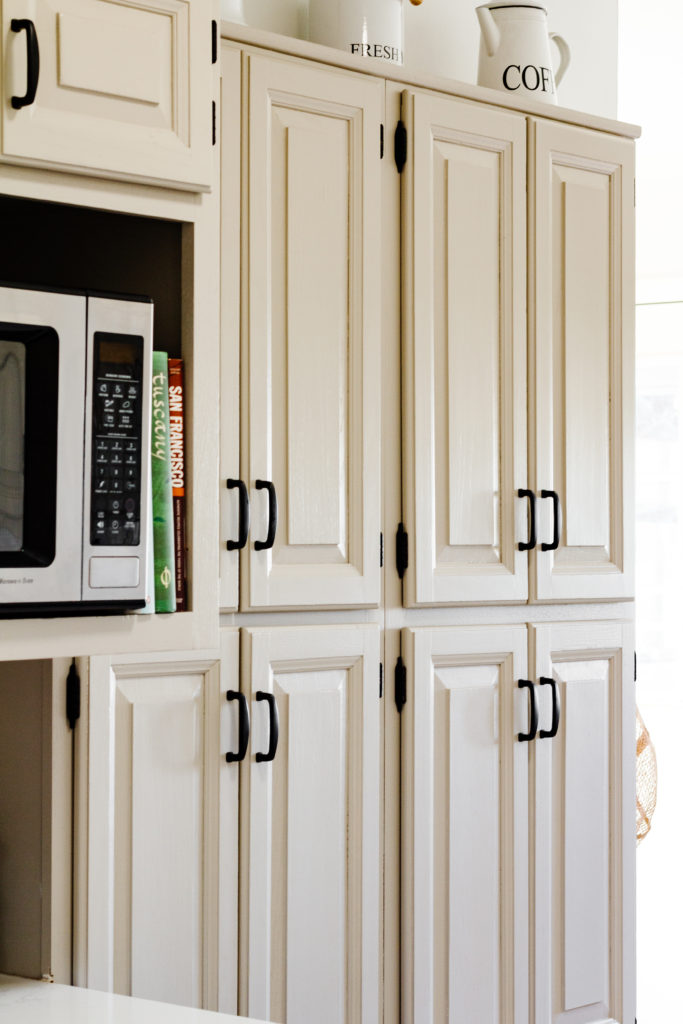
The hardware was really what gave these cabinets a modern pop. I kept the original hinges and spray painted them in matte black. Then I ordered a set of bar pulls for the doors, and a set of cup pulls for the drawers. The hardware was really the most expensive of the cabinet makeovers. Who knew having so many doors would add up?
Kitchen Makeover Cost – $10,601
- Gas line install – roughly $600
- New Gas Range – $745
- Under Cabinet Hood Vent – $262
- Ceramic Tile Install – $2250
- Wall Removal in Dining area to open kitchen – $400
- Quartz Countertops – roughly $4000 (installation included)
- Subway Tile and grout – $430
- Under-mount cabinet lighting – $110
- Victorian Wall Mount Faucet with Sprayer – $205
- Wall Mount Paper Towel Holder – $14
- Farmhouse Sink – $899
- Cabinet Paint and Primer – $130
- Matte Black Spray Paint – $5
- Cabinet Hardware – $170
- Woven Window Shade – $344
- Pendant Light – $37
All in all, $10k and some change is really an amazing price for a kitchen remodel. I was quoted $7k by a cabinet painter a few years ago just for paint. While I feel they deserved every penny, at the time it just wasn’t in my budget. While my finishes aren’t super high end, and I saved money where I could salvaging reusable items, I think the overall look of the kitchen feels refreshed and new which means these finishes will last for several more years.
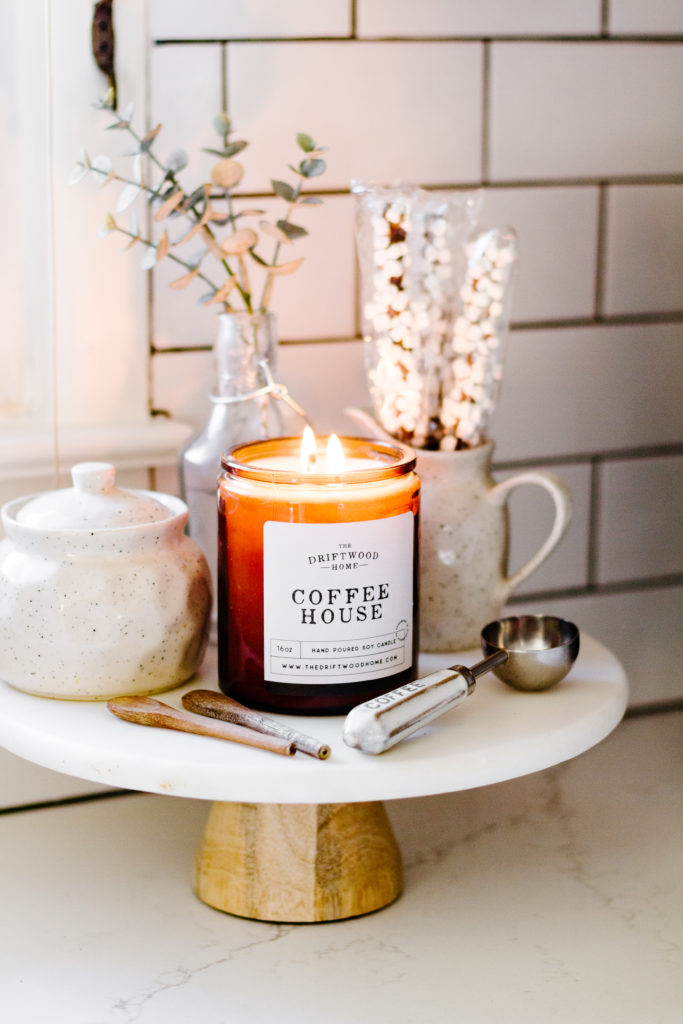
Of course all those compliments about the scent in my house is largely due to “Coffee House,” one of my top 3 favorite scents on my line.
Below, I’ve added a list of sources for my kitchen makeover to include some decor items that are still available. Some of the decor items were thrifted, so I don’t have sources for them but you can always find something similar in antique and thrift stores.
Sources
- Cabinet Color – Benjamin Moore “Pashmina”
- Samsung Gas Range – Home Depot
- Broan NuTone Under Cabinet Hood Vent – Amazon
- GE Under-mount Direct Wire Cabinet Lighting – Home Depot
- Kingston Brass Wall Mount Faucet in Oil Rubbed Bronze – Amazon
- Karyhome Wall Mount Paper Towel Holder – Amazon
- Kohler Short Apron Farmhouse Sink – Amazon
- Zinsser BIN Shellac Primer – Amazon
- Rustoleum Flat Black Spray Paint – Amazon
- Liberty Flat Black Cup Pulls – Amazon
- Cosmas Matte Black Bar Pulls – Amazon
- Nesting Herb Boxes – Amazon
- Charcuterie Board – Amazon
- Enamel Bread Box – Amazon
- Farmhouse Pendant Light – Amazon
- Woven Window Shade in “Bonaire Flaxen” – Blinds.com
I hope you enjoyed seeing my kitchen go from 1970’s orange oak to light and bright on a budget. I’d love to know what you think in the comments!








Leave a Reply